Part 3 looks at the Automation App and how it is utilized for Campaigns Pro.
Campaigns Pro (Part 3)
AUTOMATIONS
Our Automation App is a powerful tool that lets you automate your sales and marketing processes. Map out your personalized workflows in our simple builder and watch your business grow.
An automation workflow is simply a set of instructions that tell the Automation App, "when this specific trigger happens, then perform this action. For example, when an account is created, automatically send an email campaign to welcome them to your business. Create a task for you to connect personally with the client in a follow-up call.
Automation begins with a Trigger, followed by a series of Actions that are visually demonstrated in a flowchart that you will see in the screenshots below.
To send contacts you've added to a list, you have to add them to an Automation workflow. Once you add the list to an automation that triggers the workflow. In the example you see below, the workflow is made up of 3 steps.
A. The Trigger
B. ACTION 1: A Delay (if you want to delay the next event)
C. ACTION 2: Sending a Campaign
In all likelihood, we have already created this automation workflow. Below are a series of steps on how it was created so you have a better understanding of how it works. This will come in handy when you want to modify the workflow or experiment with making up ones of your own.
A. CREATING A TRIGGER

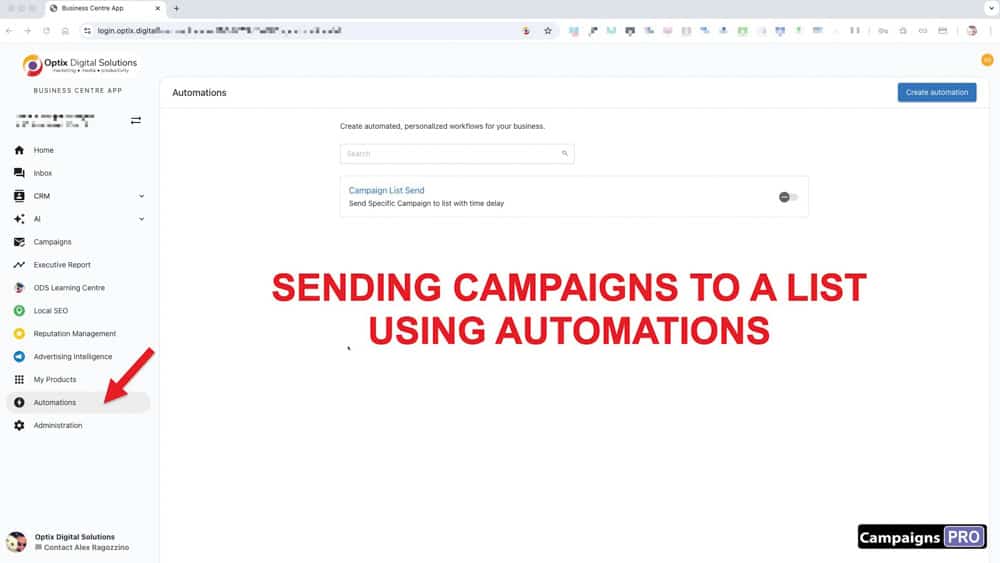
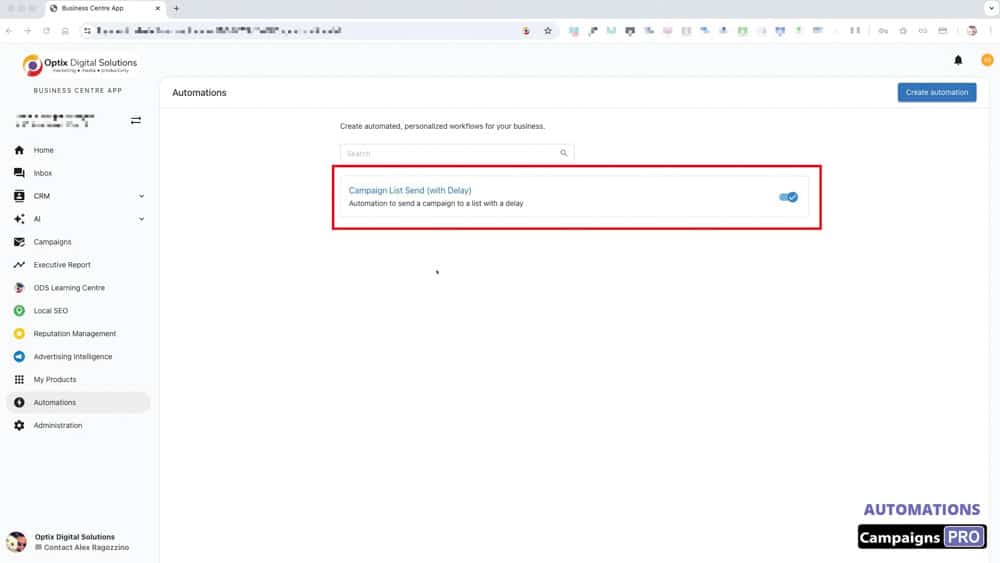
1. Look for the "Automation" on the left side menu and select the Blank option.
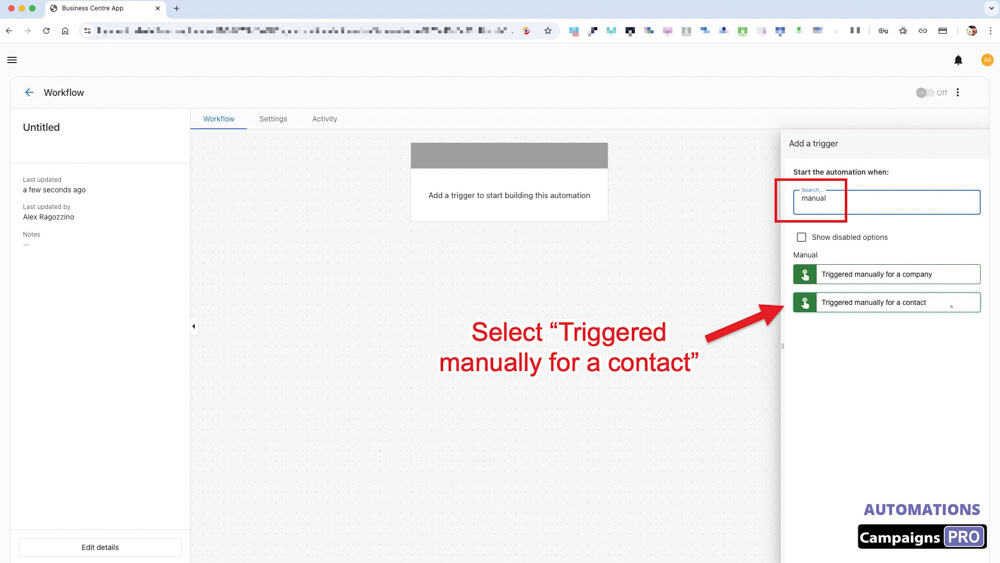
2. In the search bar, enter "Manual" to locate the "Triggered manually for a contact" trigger
B. ADD A DELAY
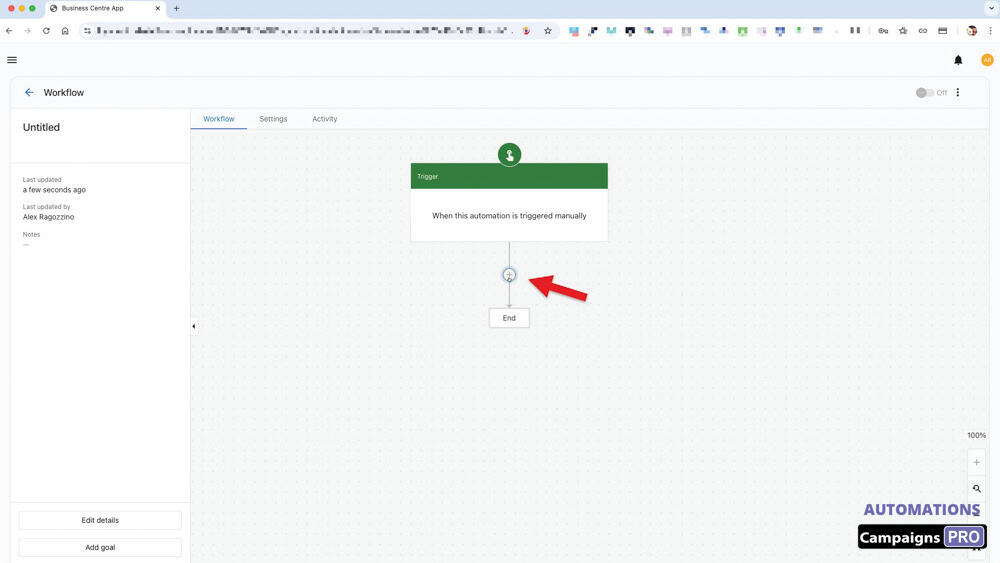
3. To add an action, click on the "+" icon as shown.
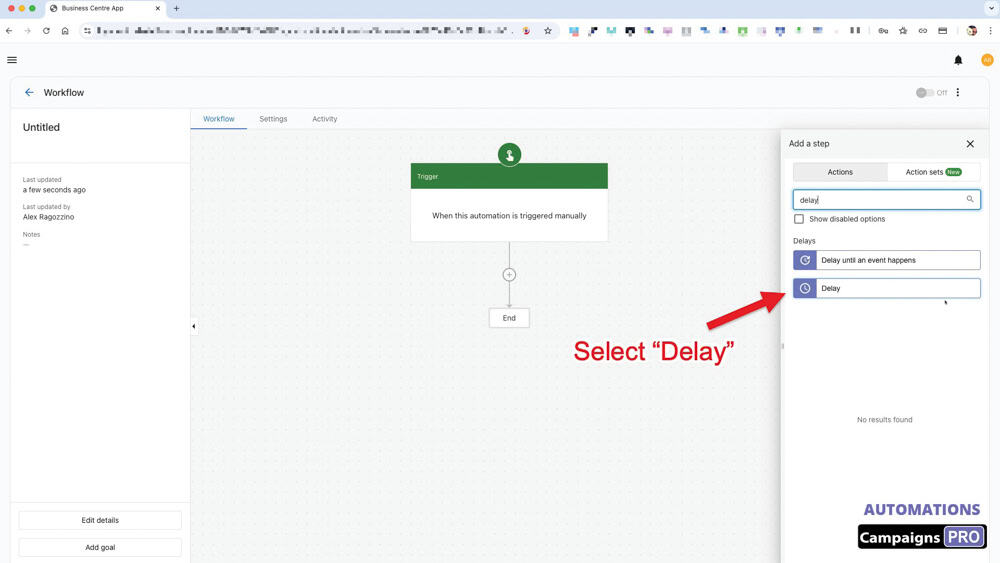
4. Search and select the "Delay" action step.
This is what helps you schedule when you want to send out your campaign.
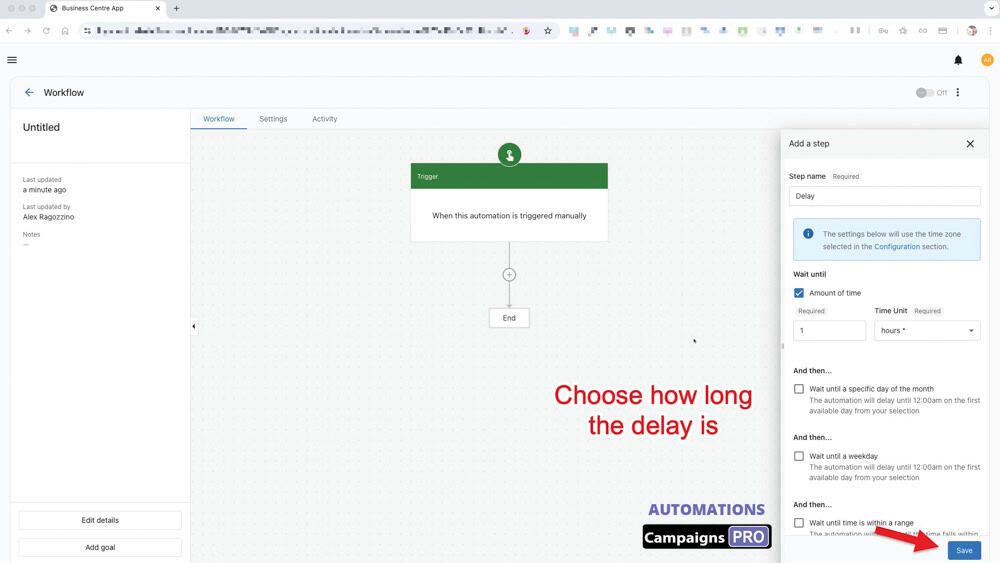
5. Decide how long to delay sending the campaign
You can set it by:
- Time limit (how many days, hours or minutes later)
- Which day of the week
- What time range
C. ADD A CAMPAIGN
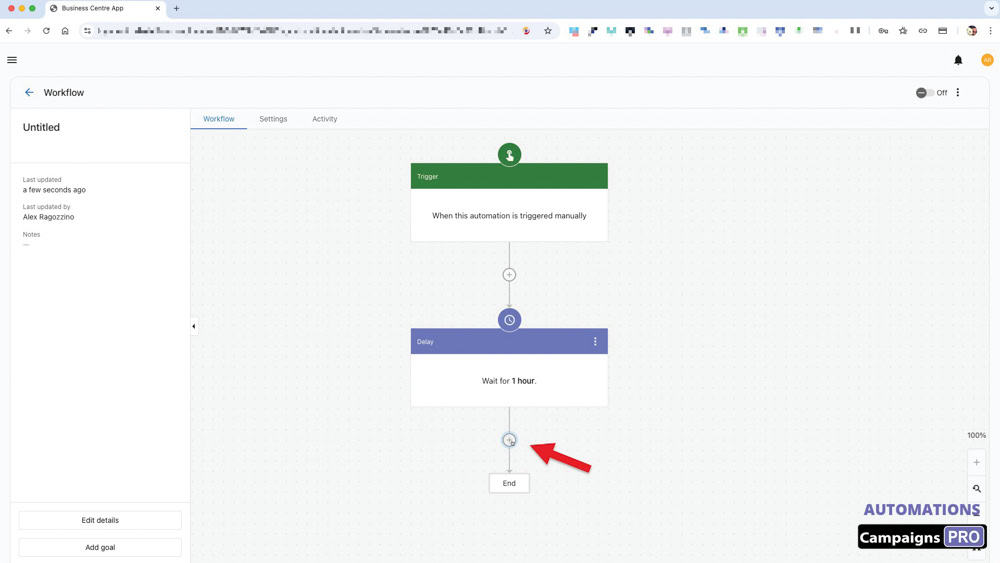
6. Click on the "+" to add the next step.
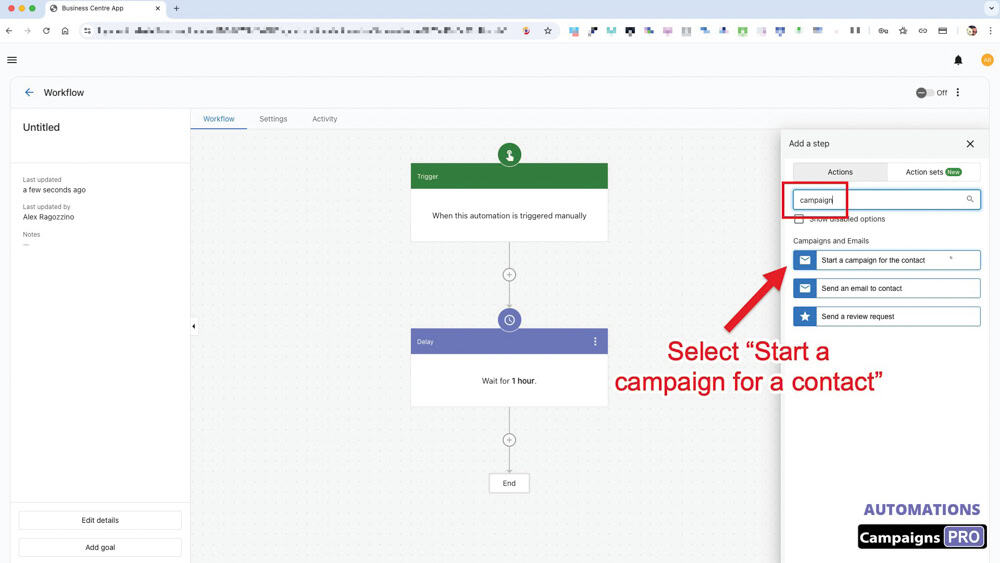
7. Add the "Start a campaign for a contact" action.
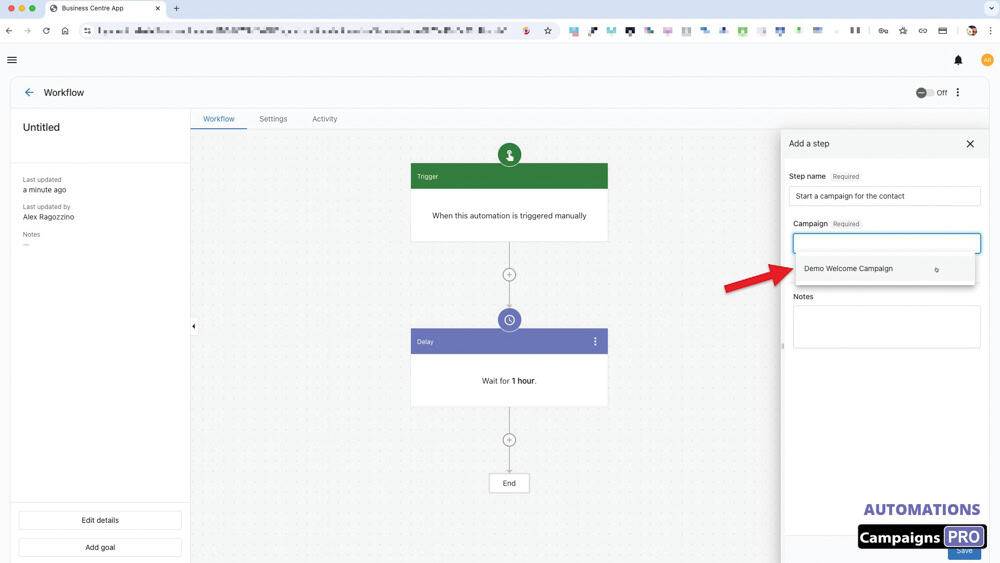
8. Select the campaign that you have created.
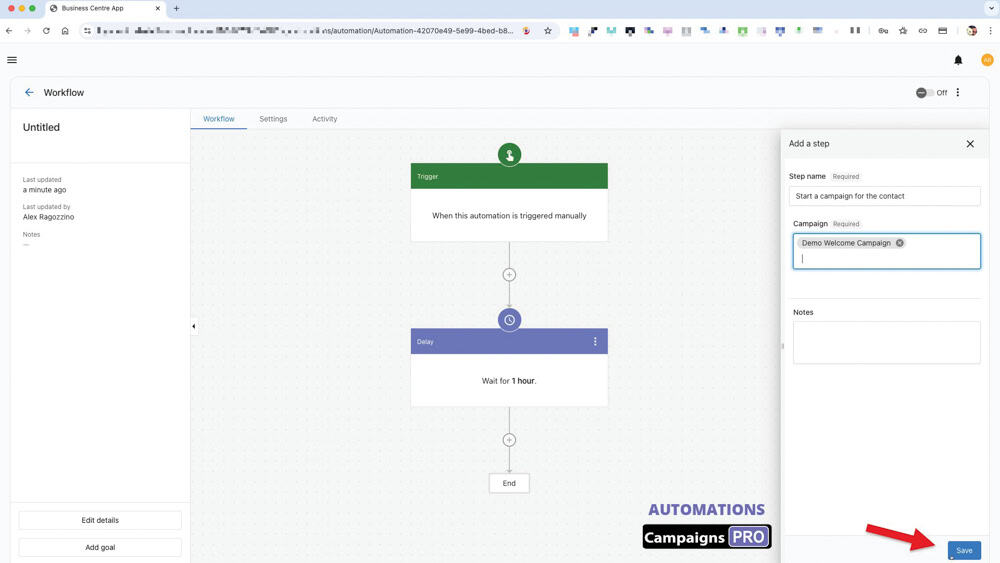
9. Remember to save this configuration.
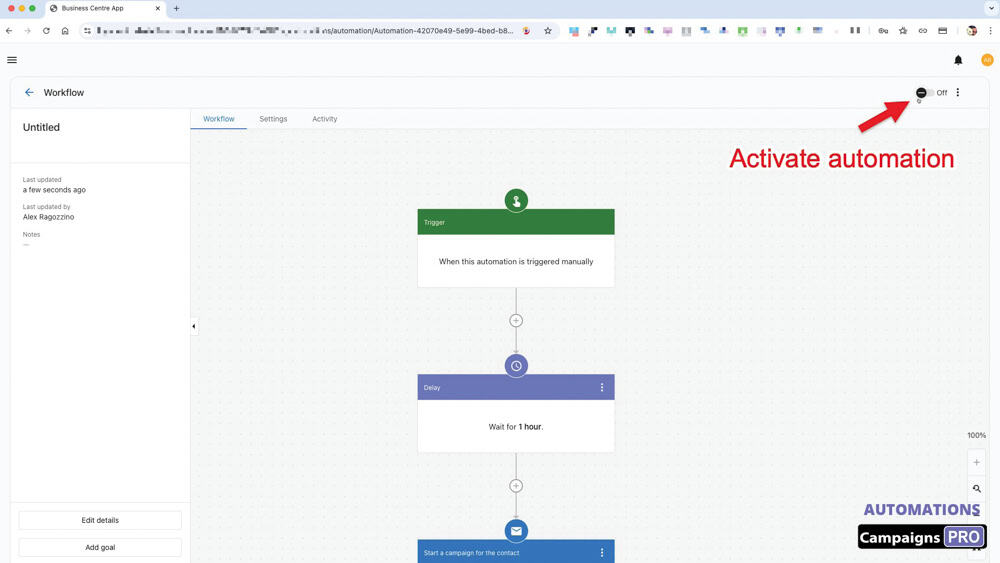
10. You are now ready to turn on this Workflow.

11. If you select "once per contact," it means the person will only be sent the campaign once.
What this means is that if you add more people to your list and start the automation again, only the new people added will get the email.

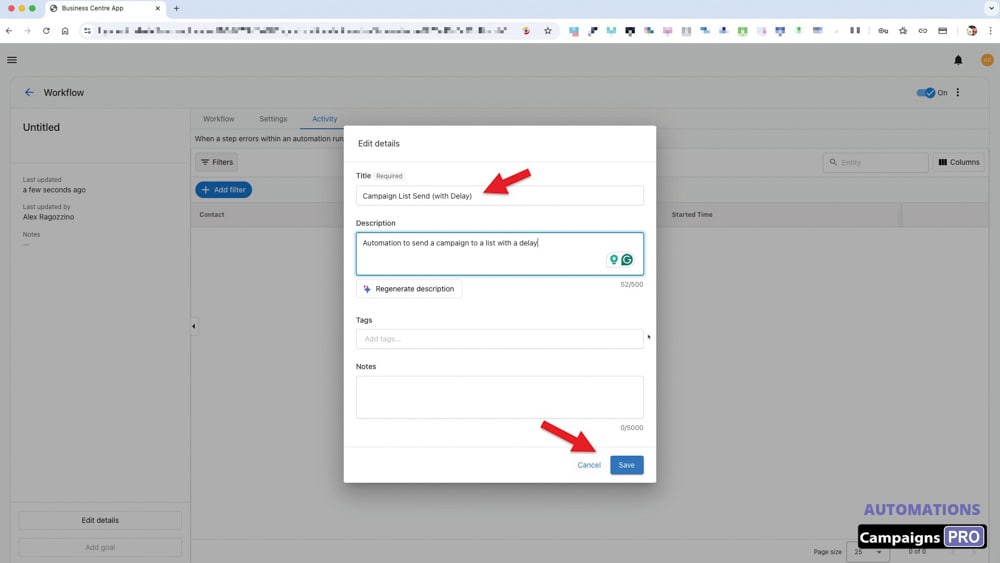
12. Click on "Edit details" to change the name and add a description of this automation.
You are all set! The trigger is ready to be used!
-----------------
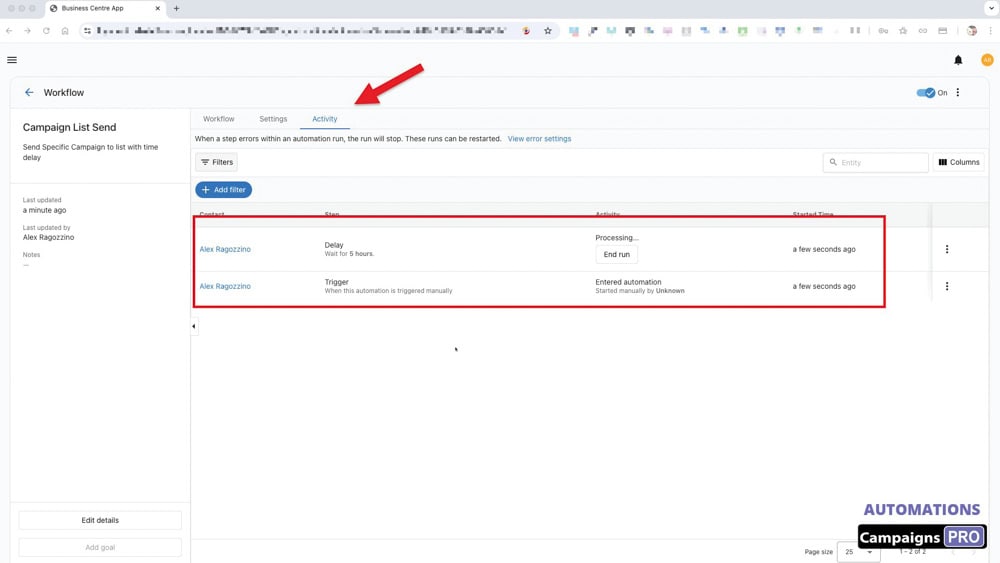
HOW TO KNOW THE WORKFLOW WAS TRIGGERED.
To see what activities were logged by this workflow, click on the workflow name as shown.